How to Expand Your MacBook Pro Storage in 3 Simple Steps (2025 Guide)

I have a 512GB MacBook Pro, and lately, I’ve been hitting that dreaded “Storage Almost Full” message more often than I’d like.
With no option to upgrade internal storage on the latest MacBook Pros, I realized it was time to take a more systematic approach. I needed to free up space and find smart, affordable ways to expand my storage.
If you’re facing the same issue — whether it’s from photos, videos, or an app overload — don’t worry, you’re not alone.
The good news.... You don’t have to spend a fortune to fix it.
Here are three simple and cost effective ways to increase your MacBook Pro’s storage in 2025.
Step 1: Clean Your MacBook Pro
Before adding any external storage, it’s a good idea to clear out unnecessary files.
- Delete unused apps and files: Free up space by removing things you don’t need.
- Use built-in tools (Settings > General > Storage): Go to your MacBook’s Storage section to identify large files.

Step 2: Add an SD Card Storage
After cleaning your MacBook, consider adding an SD card for extra storage.
If you have a MacBook Pro with an SD card slot, this is an easy option.
- Use an SD card: Insert a high-capacity SD card (up to 1TB) into the SD card slot. Store photos, videos, or even apps that don't need to be on your internal storage.
There are three options to choose from, ranked from most expensive to least expensive.
Option 1: Transcend JetDrive Expansion Card for MacBook Pro – a quick and easy way to increase your storage without any hassle.

Recommended product: Transcend JetDrive Expansion Card for MacBook
- Option 2: SanDisk 1TB Extreme PRO SD Card for faster storage expansion.

Recommended product: SanDisk 1TB Extreme PRO SDXC UHS-I
- Option 3: SanDisk 1TB MicroSD Card with Adaptor for faster storage expansion.

Recommended product: SanDisk 1TB MicroSD Card

Step 3: Add an External SSD
If you need faster, more reliable storage, consider adding an External SSD.
- External SSDs are compact and provide fast data transfer speeds, making them ideal for large files or video editing.
- Example: SanDisk and Samsung T7, T9 Portable SSD. Just plug it into your MacBook via USB-C or Thunderbolt and you’re good to go. These SSDs are available in capacities ranging from 500GB to 8TB.
Recommended product: SanDisk and Samsung T7, T9

Step 4: Use an External Desktop HDD
Looking for more storage at a lower cost? Go with an External Desktop HDD.
- External HDDs are great for massive storage (2TB-12TB+) and are ideal for backups or infrequently used files.
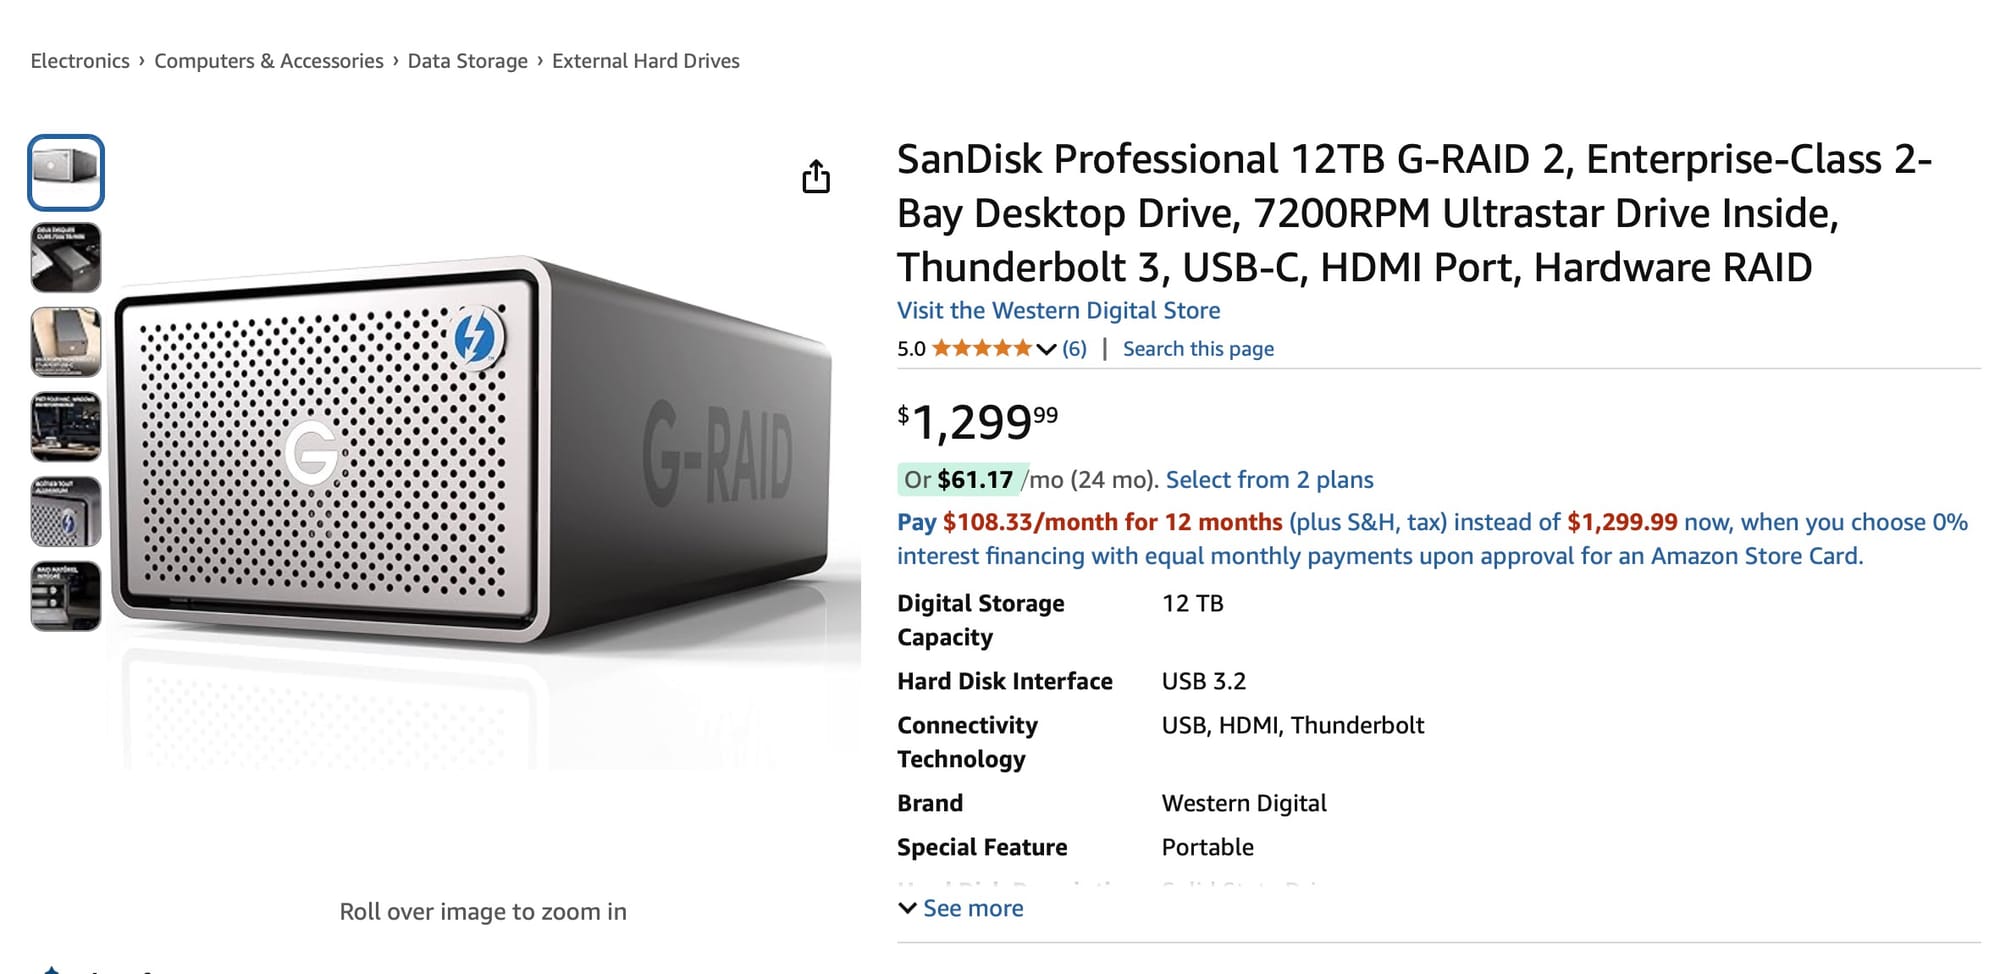
- Example: SanDisk Professional 12TB G-RAID 2 Desktop Drive. Simply plug it in via USB for plenty of additional storage.
Recommended product: SanDisk Professional 12TB G-RAID 2

Bonus Tip: Reinstall macOS to Save Extra Space
After cleaning your MacBook and adding external storage, consider reinstalling macOS.
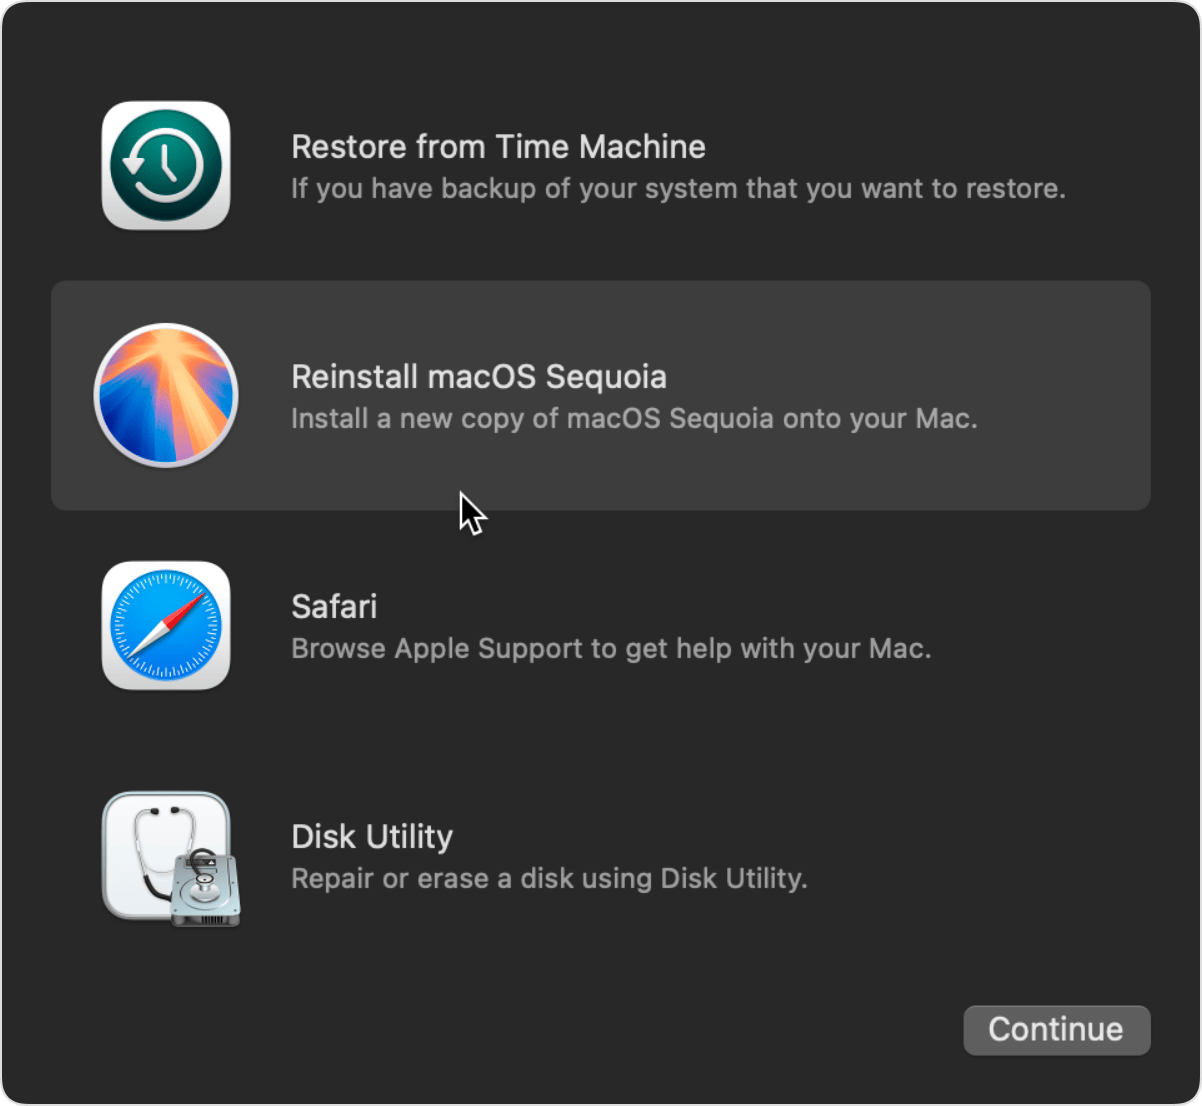
This can remove leftover files from old updates and apps, freeing up additional space.
- Tip: Don’t forget to back up your data before reinstalling!